Sunday, March 28, 2010

Homemade Girl Scout Samoa Bars


Every year several of Mark's coworkers battle it out to sell the most Girl Scout cookies for their daughters. We always buy the Samoas, and Mark always tries to ration them so that they last as long as possible. Our friend David told me that Mark was turning into a sad panda because his supply was running low, and I should surprise him by making some. I found this recipe online, and made them after I was sure that he was out of Samoas at work. I didn't even attempt to make the cookies, because the bars are exactly the same thing, but way easier to make because of the shape.

Adapted from BakingBites.com

Ingredients
Cookie Base
1/2 cup sugar
3/4 cup butter, softened
1 large egg
1/2 tsp vanilla extract
2 cups all purpose flour
1/4 tsp salt


Topping
3 cups shredded coconut (sweetened or unsweetened)
12-oz good-quality chewy caramels (I used Kraft)
1/4 tsp salt
3 tbsp milk
10 oz. dark or semisweet chocolate (chocolate chips are ok)

Directions
Cookie Crust
1. Preheat oven to 350F. Lightly grease a 9×13-inch baking pan, or line with parchment paper.
2. In a large bowl, cream together sugar and butter, until fluffy. Beat in egg and vanilla extract. 3. Working at a low speed, gradually beat in flour and salt until mixture is crumbly, like wet sand. The dough does not need to come together. Pour crumbly dough into prepapred pan and press into an even layer.
4. Bake for 20-25 minutes, until base is set and edges are lightly browned. Cool completely on a wire rack before topping.

Topping
5. Preheat oven to 300. Spread coconut evenly on a parchment-lined baking sheet (preferably one with sides) and toast 20 minutes, stirring every 5 minutes, until coconut is golden. Cool on baking sheet, stirring occasionally. Set aside.
6. Unwrap the caramels and place in a large microwave-safe bowl with milk and salt. Cook on high for 3-4 minutes, stopping to stir a few times to help the caramel melt. When smooth, fold in toasted coconut with a spatula.

Putting it together
7. Put dollops of the topping all over the shortbread base. Using the spatula, spread topping into an even layer. Let topping set until cooled.
8. When cooled, cut into 30 bars with a large knife or a pizza cutter (it’s easy to get it through the topping).
9. Once bars are cut, melt chocolate in a small bowl. Heat on high in the microwave in 45 second intervals, stirring thoroughly to prevent scorching. Dip the base of each bar into the chocolate and place on a clean piece of parchment or wax paper. Transfer all remaining chocolate (or melt a bit of additional chocolate, if necessary) into a piping bag or a ziploc bag with the corner snipped off and drizzle bars with chocolate to finish.
10. Let chocolate set completely before storing in an airtight container.

Thursday, March 25, 2010

Capellini with Tomatoes and Basil


This is a really simple and quick dish that is great for weeknights.

A quick tip for julienning basil: Stack the basil leaves on top of each other then roll them up like you would roll up a cigar. Slice the basil "cigar" from one end to the other, and when it is unfurled, you will have nicely julienned basil!

Ingredients
1 pound dried capellini or angel hair pasta
½ cup good extra-virgin olive oil
4-5 plum tomatoes, seeded and diced
18 large basil leaves, julienned
1½ cups freshly shaved Parmesan cheese
Salt and freshly ground pepper to taste

Directions
1. In a large bowl, combine the olive oil, tomatoes, basil, salt and pepper, and stir until blended. Set aside.

2. Cook the pasta according to the package instructions. Drain the pasta, add it to the tomato sauce and toss to mix. Taste and adjust the seasonings with salt and pepper. Divide the pasta among individual bowls, top with parmesan and serve immediately. 

Makes 6 servings

Tuesday, March 23, 2010

Grilled Eggplant and Zucchini Stacks


The condo that we live in does not allow for us to have a grill on our patio. I love grilled vegetables, so for years I was always bitter when I came across a recipe that called for grilled vegetables. My sister-in-law was kind enough to give me a La Creuset Grill Pan for my birthday. From November on, I pretty much grilled anything that came into our kitchen. 


A few years ago, our friend Josh served us a dish of grilled eggplants with a balsamic-tomato relish. Inspired by this, I scoured the internet for a similar recipe, and settled on making something close to this one from Cooking LightI didn't want to have the balsamic reduction incorporated into the vegetables, because the star of Josh's recipe was the relish, so here is the modified recipe:


Ingredients
Eggplant Stacks
1 large eggplant, cut crosswise into 1/2-inch-thick slices, part of the skin removed
2 medium zucchini or summer squash, sliced lengthwise into 1/4-inch thick slices
1/2 cup goat cheese
2 tablespoon  chopped fresh basil
2 teaspoon  chopped fresh oregano
freshly ground black pepper
olive oil

Tomato-Balsamic Relish
1 cup diced tomatoes
2 tablespoons balsamic vinegar
1/8 teaspoon salt
freshly ground black pepper

Directions
1. Start with the tomato-balsamic relish: Place the diced tomatoes in a bowl and season with salt and pepper. Stir in the balsamic vinegar, and set aside a room temperature to let the flavors blend.
2. Place eggplant slices in a colander. Sprinkle evenly with 1/2 teaspoon salt; toss well. Let stand 10 minutes. Rinse slices thoroughly; dry with paper towels.
3. Brush eggplant and zucchini with oil; sprinkle with remaining 1/4 teaspoon salt and black pepper. Place them onto a hot grill for about 8 minutes or until tender, turning once.
4. Meanwhile, combine cheese, basil, and oregano.
5. To assemble stack, place 1 eggplant slice on a plate; top with one-fourth of cheese mixture. Lay two strips of zucchini side by side; top with one-fourth of the cheese mixture, and repeat, ending with a slice of eggplant. Let stand 5 minutes.
6. To serve, place a spoonful of relish on top of each eggplant stack.


Makes 4 servings

Saturday, March 20, 2010

Zucchini and Swiss Chard Tart


A little while ago, I stumbled across David Lebovitz's blog and found the craziest recipe for tart crust ever. Pie and tart crusts are something that always intimidated me. Anyone can make a crust, but not many people can make a good flaky pie crust. This recipe doesn't call for the typical cold butter worked into flour *just so* with ice cold water. You basically dump a whole bunch of stuff into bubbling hot butter, and voila - a buttery, flaky crust. It's so easy to make, so I went on a pie and tart making bender.


This is one of the recipes that I made after going to the Farmer's Market in Neptune beach. Twinn Bridges had some beautiful Swiss chard that I had to use. The beauty of this recipe is that you don't have a top crust that will hide the pretty Swiss chard.


Adapted from New York Times

Ingredients
French Tart Dough
1 pound Swiss chard
2 tablespoons extra virgin olive oil
1 medium onion, finely chopped
2 pounds zucchini, cut in small dice (1/4 to 1/3 inch)
2 to 3 large garlic cloves (to taste), minced
1 teaspoon fresh thyme leaves, chopped
1 to 2 teaspoons chopped fresh rosemary (to taste)
2 ounces Gruyère cheese, grated (1/2 cup, tightly packed)
3 large eggs, beaten
Salt to taste
Freshly ground pepper


Directions
1. Bring a large pot of water to a boil while you stem the greens, and wash them thoroughly in several rinses of water. If the ribs are wide, wash and dice them, then set aside. Fill a bowl with ice water. When the water reaches a rolling boil, add a generous amount of salt and the chard leaves. Blanch for one minute, until just tender. Using a slotted spoon or deep-fry skimmer, transfer to the ice water, then drain. Squeeze out excess water and chop. Set aside.
2. Heat the oil over medium heat in a large nonstick skillet, and add the onion and diced chard stems, if using. Cook, stirring, until tender, about five minutes. Stir in the zucchini. Season to taste with salt, and cook, stirring, until just tender and still bright green, about 10 minutes. Stir in the garlic, thyme and rosemary, and cook with the zucchini and onion until the garlic is fragrant, about one or two minutes. Stir in the greens, toss everything together, and remove from the heat. Taste and season with salt and pepper.
3. Beat the eggs in a large bowl. Stir in 1/4 to 1/2 teaspoon salt (to taste), the zucchini mixture, and the Gruyère. Mix everything together, add pepper, taste once more and adjust seasoning.
4. Preheat the oven to 375 degrees. Oil a 10-inch tart pan. Roll out two-thirds of the dough and line the pan, with the edges of the dough overhanging. Freeze the remaining dough. Fill the lined pan with the zucchini mixture. Pinch the edges of the dough along the rim of the pan. Place in the oven and bake 50 minutes, until set and beginning to color. Allow to rest for at least 15 minutes before serving (preferably longer). This can also be served at room temperature.

Thursday, March 18, 2010

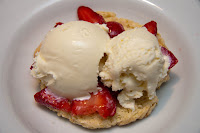
Strawberry Shortcake


When we go to the Cheesecake Factory my husband normally orders an appetizer and copious amounts of beer so that he has room to order the strawberry shortcake. The shortcake is devoured almost as soon as the plate touches the table. Needless to say, he is fan of their strawberry shortcake. So, when I happened across Meemo's recipe for Cheesecake Factory Strawberry Shortcake, I had to try it. That night, I became my husband's hero. And Meemo became my hero.


p.s. Is Meemo a cat?


Ingredients

The Strawberries
2 Quarts (4 pints) sliced strawberries
1/2 Cup Granulated Sugar

Whipped Cream
1 Quart Heavy Cream
3-4 Teaspoons Sugar (to taste)
3/4 Teaspoon Vanilla
Shortcake Biscuits

2 cups flour
4 teaspoons baking powder
1/4 teaspoon salt
3 tablespoon sugar
5 tablespoons butter
3/4 cup half and half 


Vanilla ice cream

Directions

The Strawberries:
Wash and drain strawberries. Slice strawberries, sprinkle sugar evenly over strawberries. Gently mix the sugar into the strawberries, ensuring that all strawberries are covered with sugar. Chill for 2 hours.

Whipped Cream:
Combine ingredients in stainless steel bowl. Whip to stiff peaks.

Shortcake Biscuits:
Mix flour, sugar, baking powder and salt thoroughly in a 6-quart stainless steel bowl. Cut in butter until mixture appears mealy and crumbly. Add cream and buttermilk, mix gently for 20 to 30 seconds. Don't over mix, it will become sticky. Lightly flour work surface, place dough out to approximately 1/2-inch thick. Cut 4 to 6 ounces per round, place on non-stick baking pan, approximately 2 to 3 inches apart. The biscuits will triple in size. Bake at 375 degrees for approximately 15 minutes.

To Serve:
Cut the biscuit in half horizontally, separating the top from the bottom half. Place the bottom half of the biscuit in a medium bowl. Cover the biscuit bottom with 4 ounces of strawberry mixture. Place two scoops of vanilla ice cream in the center of the biscuit bottom. Place the remaining biscuit half on top of the ice cream. Pour 4 additional ounces of the strawberry mixture over the biscuit top to moisten it, allowing some of the berries to fall into the bowl. Finish with a dollop of whipped cream.

Makes 8-10 biscuits

Sunday, March 14, 2010

Key Lime Pie


When I saw these key limes at the Farmer's Market, I couldn't resist making a pie. Also, I wasn't creative enough to think of anything else to make with them. :)

Although it was actually worth it in the end, I was cursing the pretty little limes. They seem to have 18 million seeds in them, and they are so small that squeezing the required amount of lime juice was quite the pain. I finally broke down and bought a lime squeezer...best invention ever. If I find Key lime juice, I will be making this recipe with it instead, if I am in a rush. Key limes are different from the regular (Persian) limes that you find at the supermarket - not only are they smaller and packed with more seeds, but their juices are paler in color. So, if you ever order a key lime pie at a restaurant and it is green, they have either added food coloring or used Persian limes.


I took this recipe from the Food Network, but it was far too tart for my tastes, so I added some sugar to the filling. This is optional, and is purely based on personal preference.


Ingredients
Graham Cracker Crust
1 paper-wrapped package graham crackers (1/3 of a 1 pound box) or 1 cup plus 2 1/2 tablespoons graham cracker crumbs
5 tablespoons melted unsalted butter
1/3 cup sugar

Filling
3 egg yolks
2 limes, zest grated (about 1 1/2 teaspoons)
1 (14-ounce) can sweetened condensed milk
2/3 cup freshly squeezed lime juice
2 tablespoons sugar, or to taste (optional)

Topping
1 cup heavy or whipping cream, chilled
3 tablespoons of confectioners' sugar

Directions
For the graham cracker crust
Preheat the oven to 350 degrees F. Butter a 9-inch pie pan. Break up the graham crackers and place in a food processor and process to crumbs. (If you dont have a food processor, place the crackers in a large plastic bag: seal and then crush the crackers with a rolling pin.) Add the melted butter and sugar and pulse or stir until combined. Press the mixture into the bottom and sides of the pan, forming a neat border around the edge. Bake the crust until set and golden, 8 minutes. Set aside on a wire rack. Leave the oven on.

For the filling
Meanwhile, in a electric mixer with the wire whisk attachment, beat the egg yolks and lime zest at a high speed until very fluffy, abut 5 minutes. Gradually add the condensed milk and continue to beat until thick, 3 or 4 minutes longer. Lower the mixer speed and slowly add the lime juice, mixing just until combined, no longer. Pour mixture into the pie crust. Bake for 10 minutes, or until the filling has set. Cool on a wire rack, then refrigerate. Freeze for 15 to 20 minutes before serving.

For the topping
Whip the cream and the confectioners' sugar until nearly stiff. Cut the pie in wedges and serve very cold, topping each wedge with a large dollop of whipped cream